
First, I use Easy Cast Resin - around 14$ at Micheal's, use a half off coupon to get a set cheaper. It takes about 24 hours to cure, and you need to leave it be set, it you mess with it you get issues on final pieces. Seriously, get that coupon.
I want to try out Smooth On's resin, as its white and I think it would be better to paint, but I am not able to as of yet, if I do I will review it of course!
Tips before you BUY
1. Make sure you have a mold, silicone molds are great but look in the inside, is it shiny? If its not the piece will not come out shiny either, I am not sure what causes this but it happens. You can do reverse process for these molds or attempt to dome/glaze a piece to make it shiny. I personally like matte on some projects.
RESIN IS NOT FOOD safe. So cut your mold in half if you want, it is what I do and LABEL one food and one resin.
There are several types of molds, from plastic to home made silicone to ice cube trays. All work well for resin typically just depends on the project. I like the silicone ones as they move more IMO and work better for details. In the future I will be making my own as well for test.
2. Colorants. This is a huge issue, I find. Anything you have for color, do not put a ton of it in, it can make it dry soft if you over do it.
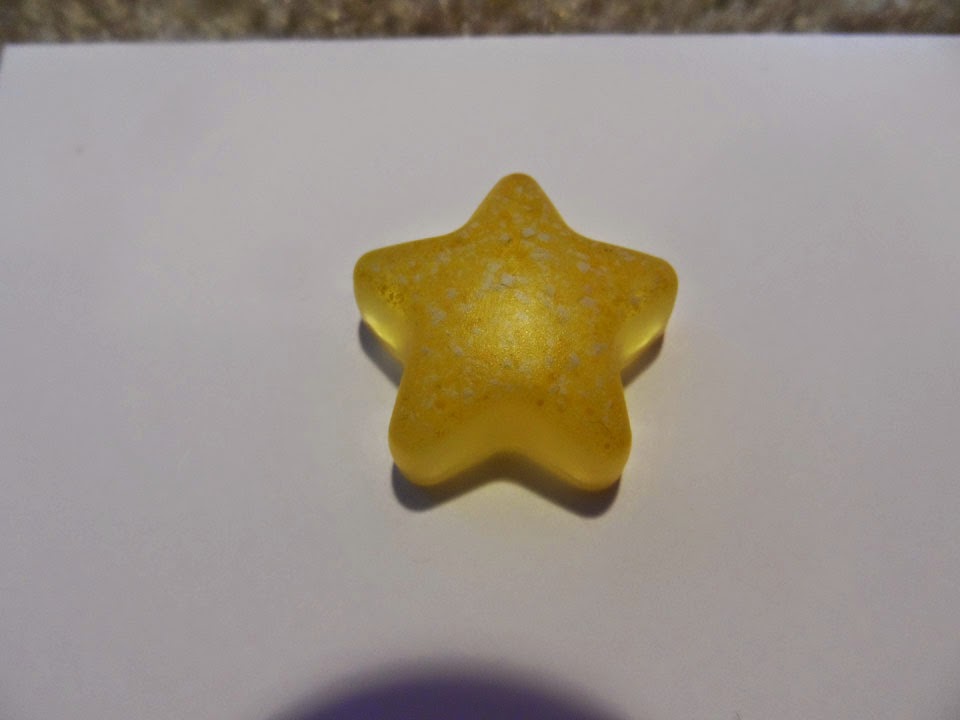
I tried nail polish, which worked but was a bit see through(my logic is it dries hard). Then I tried pastels shaved off, which worked okay but SUPER needed to be mixed well. Then I tried eye shadow, which I have seen done. I think I put too much, as I think the bit that did not dissolve, would eventually dissolve. Then I tried calligraphy ink, as I had some. I liked this best. Its a bit see through still, but I think that will work for most of my projects. I then tried some plain ink for white backs - that I got at an art shop. It is for stamping. See below all my pictures and results! I liked the ink best personally.


In light...


Nail Polish (not pictured)| Pastels | Eye Shadow | Calligraphy Ink | Stamping Ink
If you use paint/etc use very little! I am still testing out colors and paints, etc. I will update with what I find later on.
3. Embeds. Mainly want to touch on stickers, paper stickers have to be sealed. You can do this with glue, modpodge or tape. All work okay. More people on youtube have more tips for this, I am not a fan of putting stickers in pieces as much - so I skipped trying this.
Glitter works great, MOST sprinkles will not dissolve, there are some that might but I have not seen them dissolve in it as of yet. Gems work well as well, just remember it is backwards.
I hear puffy stickers are a pain as well, as they tend to float.
Tips before you POUR
1. VENTILATION AND PROTECTION
This smell is strong, so ventilate the room. I typically open the window. I should MORE often, but its cold here.
Protect your work space. Sure you think you are a clean crafter but WAIT that mix is really hard to get off items! So pick a paper work space, or wax paper or something to protect you. I use a sheet of cardboard.
Tip to get it off acetone, alcohol or precious gas and paint removers all work well. Soap does not. Just FYI.
2. Mix SLOW
Bubbles will appear the fast you pour. Best way to get rid of them, let it sit for a bit, the bubbles will come up and pop them with a heat source - like a lighter.
3. LET IT SIT
It is very tempting to put in items immediately, but depending on the items, you need to wait for the resin to get tacky. Stickers and glitter all stick better if you wait 10 minutes or so it will go more smoothly, for the first layer. Then do not touch it, I cannot tell you how many times I have accidentally poked it cause I was impatient. Its hard to wait, I know.
!Remember! - you pieces will not be amazing the first time you do this! Be prepared to fail, write down your process if needed and try different things! It takes time to be good. Most of my first pours this month failed.
and this leaves me to
Upcoming DIY/Post for Resin
Coloring Ideas (galaxy, etc)
Doming/Finishing
Nail Polish water painting
Mold Making for Resin projects
Cube/Sphere piece
No comments:
Post a Comment